
This series is about using Power Platform to help streamline the work of healthcare providers and increase patient safety. In this tutorial there will be 2 entity tables – one for storing all the directions and one for storing the condition sets that each direction will be pulled by. The key to joining these two tables will be a lookup value for each condition ID.
If you missed the introduction to this miniseries, please refer to the post linked below:
Applying Power Platform to the Healthcare Industry
Table 1: The Condition Set:
In this table, each row will be a condition and will be given a distinct ID. The conditions used in this example are:
Calcium > 5.0
Calcium < 4.0
Calcium 4.0 – 5.0
Potassium > 5.3
Potassium < 4.0
Potassium 4.0 – 5.3
Blood Urea Nitrogen (BUN) 10 – 20
Blood Urea Nitrogen (BUN) < 10
Blood Urea Nitrogen (BUN) > 20
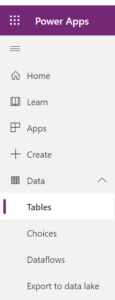
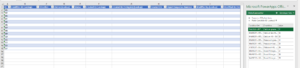
Below are the steps to create entity tables in Microsoft Dataverse. Our starting point will be the Tables tab under “Data” (shown in the screenshot below)
- Create New entity table:
-
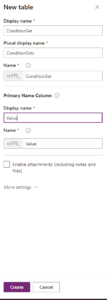 In this example, the display name was changed to Value, this will be the unique key that will serve as the lookup in the second entity table.
- Add a column for Condition (this will be each condition description)
- Type in each condition into new table. “The Edit Data in Excel” function is useful for quick and easy data entry

Your first table should look something like the screenshot below: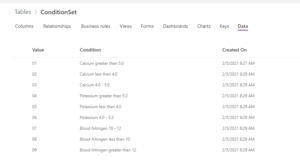
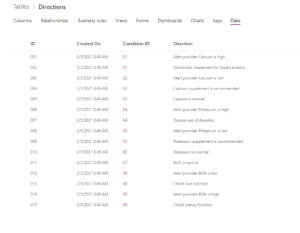
Table 2: The List of Directions:
- Create a new entity table called Directions
- Add a column called Direction (this will be each direction that will show up in the checklist of directions for the user
- Add a new column called Condition ID (this will be the lookup to the ConditionSet table)
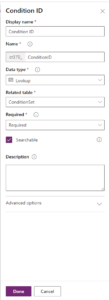
- Fill out data using “Edit data in Excel” tool. When you click on the Condition ID column, a lookup table to ConditionSet’s Value column will appear to select from.
Once you’ve added in your directions, your table should look something like this:
Now that you have your directions with their corresponding condition ID lookup values, you can query specific directions based on which conditions are present and returned to the Power App.
Part 2 of this mini series will cover using power automate to extract lab result values from a response object, using those values to determine which conditions are true and then passing the true condition keys to the Power App. You can access it below: