
What Is MFA, and Why Is It Important?
As the security landscape evolves and threats compromising user credentials become more common, it’s important to implement strong security measures to protect your business and customers.
Multi-factor authentication (MFA) is one of the easiest, most effective ways to prevent unauthorized account access and safeguard your Salesforce data. MFA adds an extra layer of protection against threats like phishing attacks, credential stuffing, and account takeovers.
You must activate “two-factor authentication” and connect it to the Salesforce Authenticator application, where the user can use their login with valid credentials. The Salesforce authenticator app can generate a time-based, one-time password for every 30 seconds; it then prompts a notification to approve or deny the login.
MFA Verification Method in Salesforce
MFA adds an extra authentication step to your Salesforce log in process:
- The user enters their username and password, as usual.
- The user is then prompted to provide a verification method.
Salesforce requires users to provide a verification method that’s in their possession. Depending on your Salesforce product, you can allow any or all of these methods.
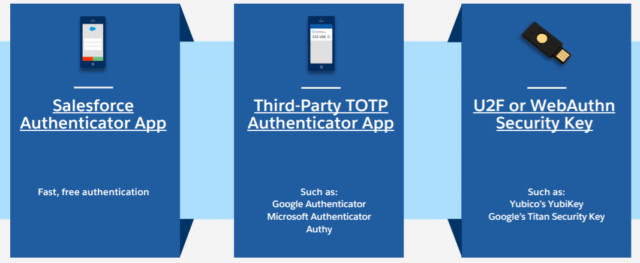
Figure 1: MFA Verification Methods
MFA Verification Using Salesforce Authenticator App
The Salesforce Authenticator mobile app makes MFA easy by integrating into your login process. It’s simple for users to install and connect to their Salesforce accounts.
When a user logs in, they get a push notification on their mobile device. The user taps the notification to open Salesforce Authenticator and sees the following information:
- The action that needs to be approved
- Which user is requesting the action
- Which service is requesting the action
- What device the user is using
- The location from which the request is coming with this information can quickly and confidently approve or deny the authorization request. They can also automate the extra authentication step when working from a trusted location.
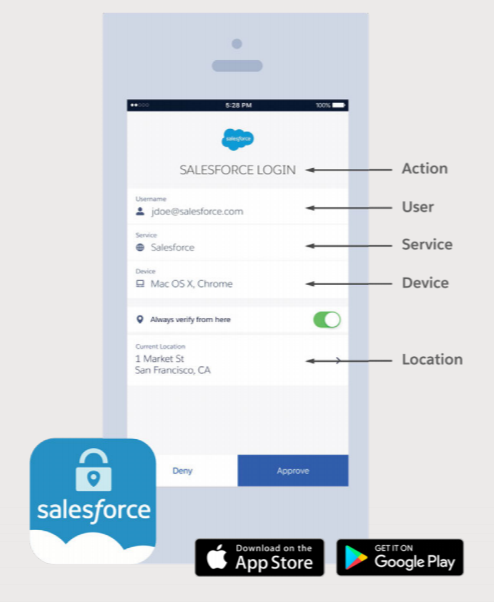
Figure 2: User Login Details
Steps for Implementing MFA Using Salesforce Authenticator App
Prerequisites
- Salesforce Trailhead playground or Developer Edition account
- Salesforce Authenticator application (supported on both Android & IOS)
Step 1: Login into your Salesforce account
Step 2: On the setup page, search “Permission Set.”
Step 3: Click the “New” button to create a new permission set for the user and enter the label name. The API name will automatically generate, then click the “Save” button.
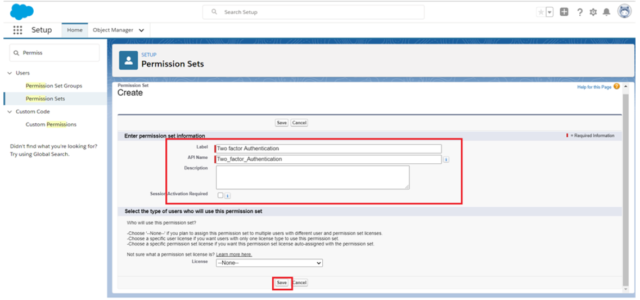
Figure 3: New Permission Set

Step 4: After saving, scroll down and click “System Permissions” under the system section in the created permission set. Then click the “Edit” button.
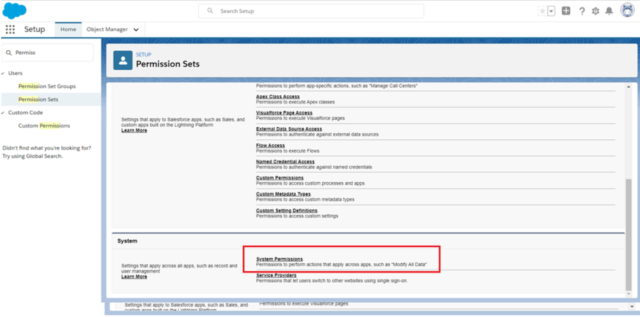
Figure 4: Edit System Permissions
Step 5: Scroll down or search “Multi-Factor Authentication for User Interface Logins” and enable the check box. To save the update, click the “Save” button.
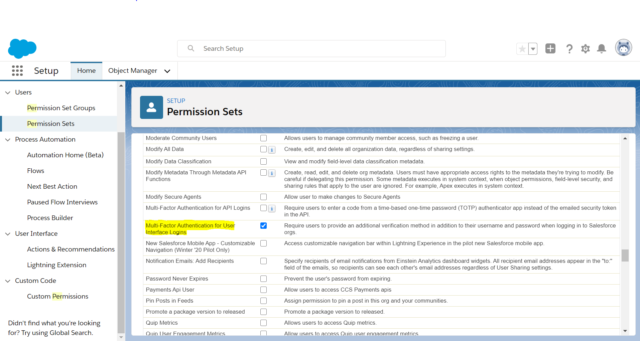
Figure 5: Check Multi-Factor Authentication for User Interface Logins
Step 6: Click the “Manage Assignments” button and then click the “Add Assignments” button to add users.
Step 7: Select the user to enable two-factor authentication, then click the “Assign” button.
Step 8: Click the “Done” button and activate the created permission set.
Step 9: Log out of your Salesforce account.
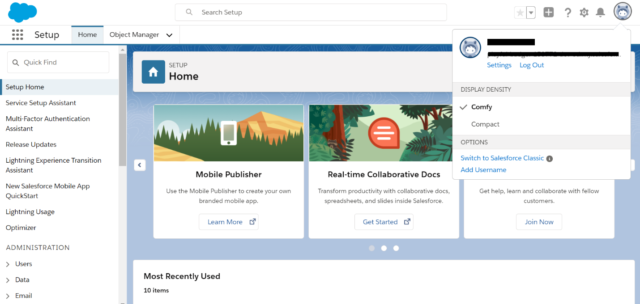
Figure 6: Log Out of Account
Step 10: Download and install the “Salesforce Authenticator” application from your mobile device’s app market.
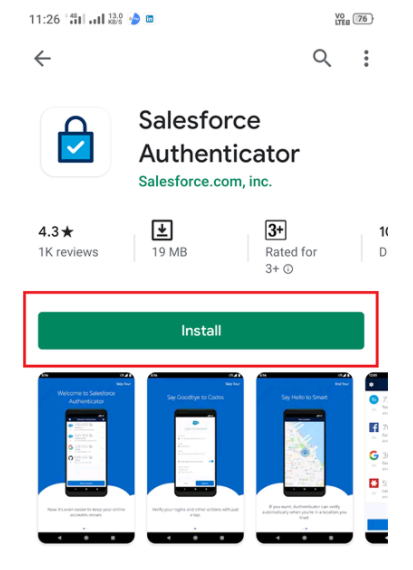
Figure 7: Download Salesforce Authenticator
Step 11: Open the “Salesforce Authenticator” app and click “Add an Account.”

Figure 8: Open Salesforce Authenticator
Step 12: On your mobile device, the app displays a two-word phrase authenticator. Hold that word on your mobile device.
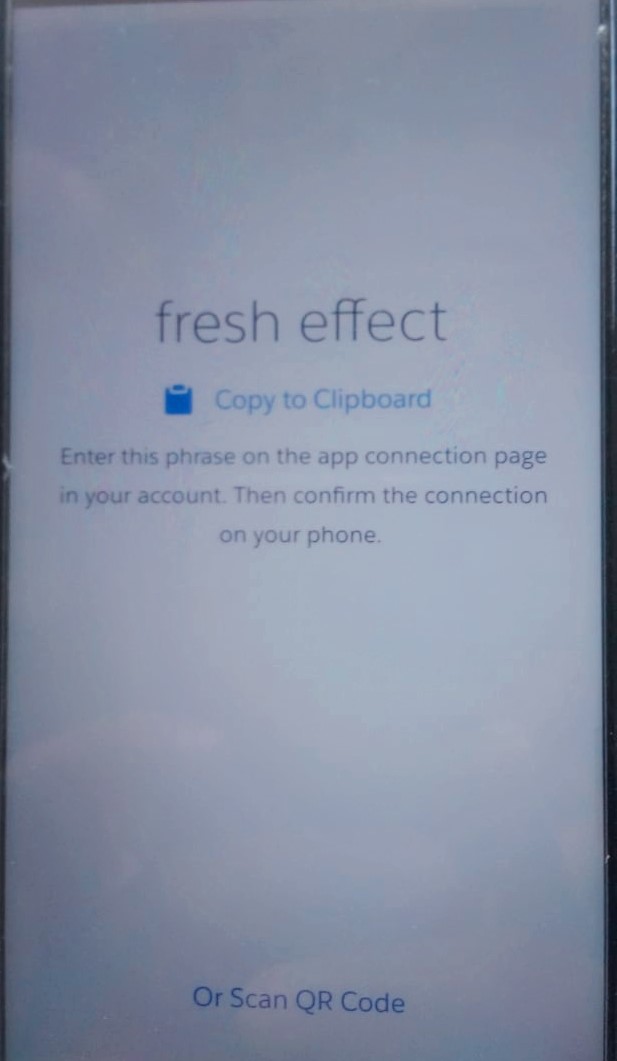
Figure 9: Two-Word Phrase in App
Step 13: Log in to the Salesforce account that created the permission set.

Figure 10: Account Login
Step 14: After clicking on the login button, the “Connect Salesforce Authenticator” page will be opened. Enter the two-word phrase from the Salesforce Authenticator application and then click the “Connect” button.
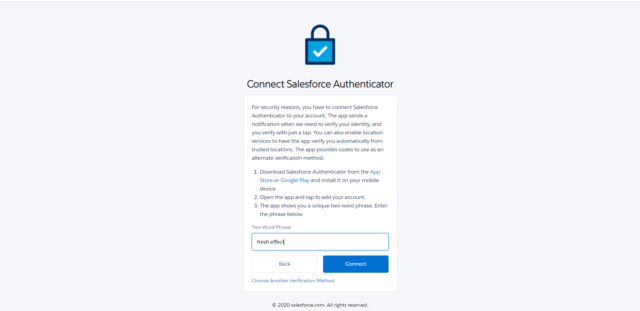
Figure 11: Connect Salesforce Authenticator Page
Step 15: Now, check your Salesforce Authenticator app; it will prompt you to connect with the authenticator. Click on the “Connect” button.
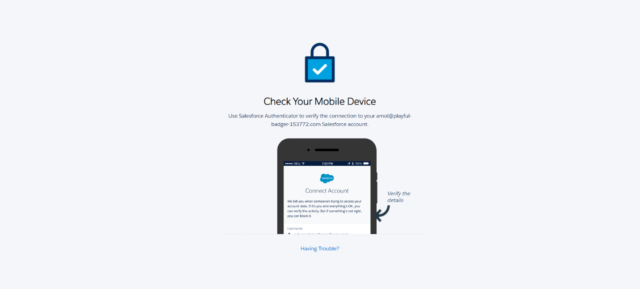
Figure 12: Connect Account Request Page
Step 16: Your mobile device now displays your username and service name. Check the details after clicking the “Connect” button on your mobile device.
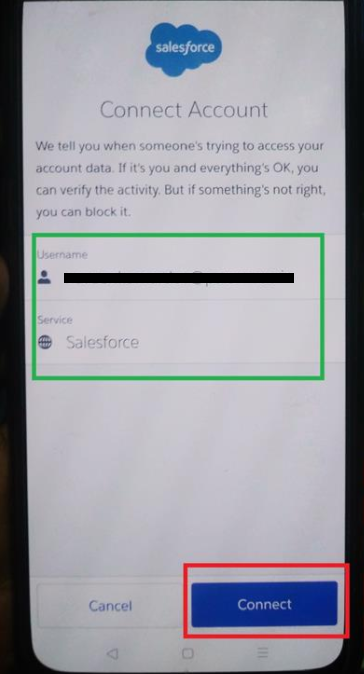
Figure 13: Username and Service Name Details
Step 17: If successfully connected, you’ll be automatically redirected to your Salesforce account’s main page. You can log out of this session to test your multi-factor authentication.

Figure 14: Log Out Current Account Session
Step 18: Again, enter your login credentials and then click the “Login” button.
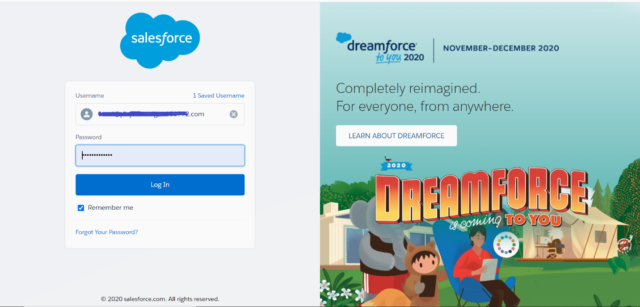
Figure 16: Log In to Your Account
Step 19: Check your Salesforce Authenticator app; it will prompt you to approve this log in or not. Click the “Approve” button to approve this login session.
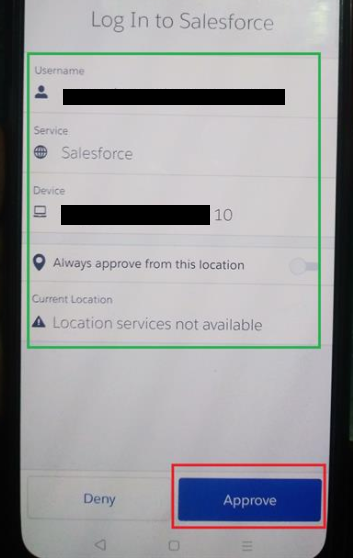
Figure 17: Salesforce Authenticator App with Details
Step 20: Your login is approved; you’ll be automatically redirected to your Salesforce account’s main page.
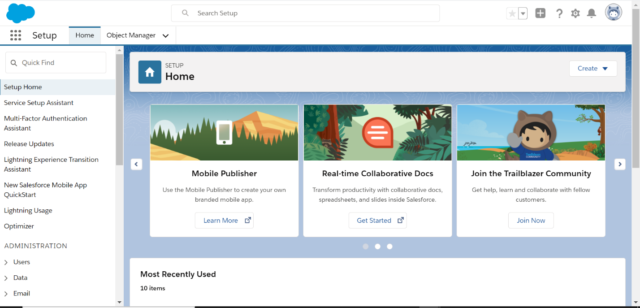
Figure 18: Salesforce Account Main Page
In summary, MFA is useful to provide an increased level of security to your system, as well as effective ways to help prevent unauthorized account access.