
The Azure Update Management solution can be used to manage updates and patches for virtual machines (VMs). Through Azure Update Management, you can manage available updates, schedule the installation of required updates, and review deployment results after installing updates.
Prerequisites
- An Azure Automation account
- A virtual machine
- It should be linked with the same workspace as the automation account
- Windows update service should be running on it
Enable Update Management
To enable Update Management on your VM:
- Open the Azure portal. In the left menu, select Virtual machines. Select a VM from the list.
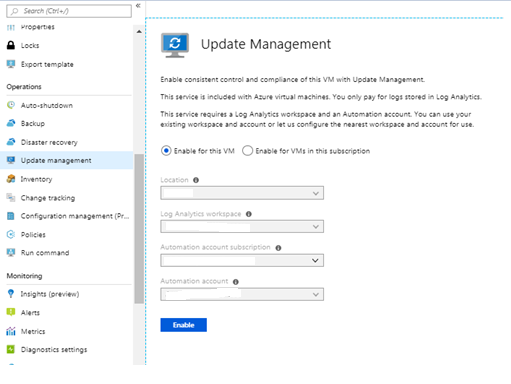
- On the VM page, under OPERATIONS, select Update management. The Enable Update Management window opens.
Select the Enable for this VM option and update the Location, Log Analytics workspace, and Automation account details. Then select Enable.
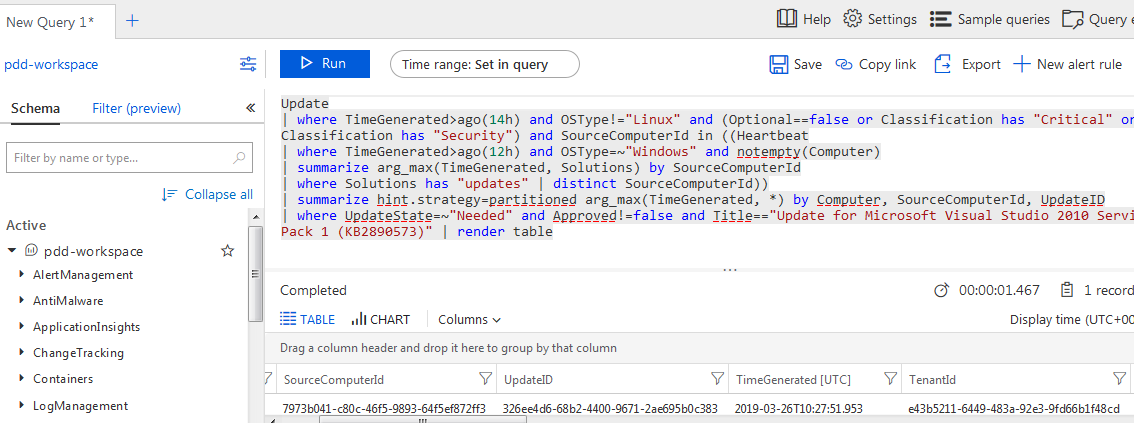
Once you enable Update Management, it will take few minutes for completion. After that, the Update management windows will open. The missing updates will be displayed under the Missing Updates tab.

To get the details of missing updates, click on any update to open the Log Search window. You will see a predefined query for that specific update. You can modify the query for detailed information if required.
Schedule an Update Deployment

The next step is to schedule an update deployment. Open the automation account. In the left menu, select Update Management.
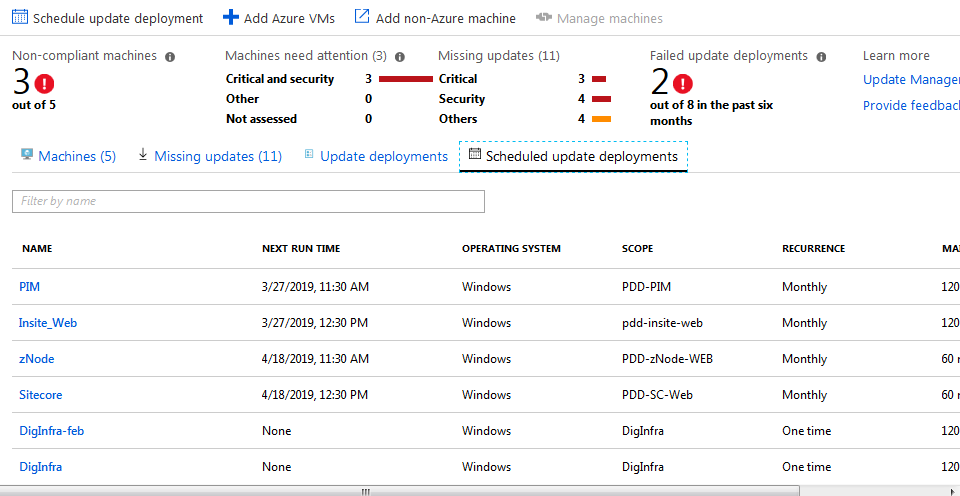
The update Management window will open. Under the Machines tab, all the machines connected to the automation account through the linked workspace will be displayed. Under the Update Deployments tab, you can see the status of past scheduled deployments. Under the Schedule update deployment tab, you can see a list of upcoming and completed deployments.
In this step, you can schedule the new deployment for specific VMs or multiple VMs at once, select the update classification, include or exclude certain updates, and specify the schedule.
Select Schedule update deployment. The New update deployment window will open and you can specify the following information:
- Name: Enter a unique name for the update deployment.
- Operating system: Select the operating system (OS) (Windows or Linux) based on the VMs.
- Groups to update (preview): No action needed for this option. Keep it as it is.
- Machines to update: Select Machines option. All of the Azure-hosted VMs will display under the Type drop-down list. Click on the VMs that need to be added in the update deployment. The selected VMs will be displayed under Selected items section. Click OK.
- Update classification: Select the classification for type of updates you need to install on the VM. By default, all classifications will be selected.
The classification types are below, categorized by the OS of the VM:
 Include/exclude updates: In this section, you can include or exclude the patches as per the requirement. Let’s say the SQL server patch is showing in Missing Updates and you don’t want this update to install on the VM. You can mention the knowledgebase (KB) name under the exclude section.
-
- Include: Provide a list of KBs (without the ‘KB’ prefix) that should be specifically added during the update deployment.
- Exclude: Provide a list of KBs (without the ‘KB’ prefix) that need to be skipped during the update deployment.
- Schedule settings: This option can be used to schedule the update deployment. You need to specify the Date, Time, Time Zone, and Recurrence as per the requirement.
- Pre-scripts and Post-scripts: Select the scripts to run before and after your deployment.
- Maintenance window (minutes): Keep it as default.
- Reboot options: You can select from the options listed below as per requirement. The suggested and default option is “Reboot if required.“
- Reboot if required
- Always reboot
- Never reboot
- Only reboot – will not install updates
Once you specify all settings, select Create.
You can see your newly created update deployment under the Update deployment tab. It will show the next run time details and other setting you have configured.
View Results of an Update Deployment
To see the status of an update deployment, select the Update deployments tab under Update management. “In progress” indicates that deployment is currently running. When the deployment is completed, the status will show either “Succeeded” if each update was deployed successfully or “Partially failed” if there were errors for one or more of the updates.
To see all the details of the update deployment, click on the update deployment from available list.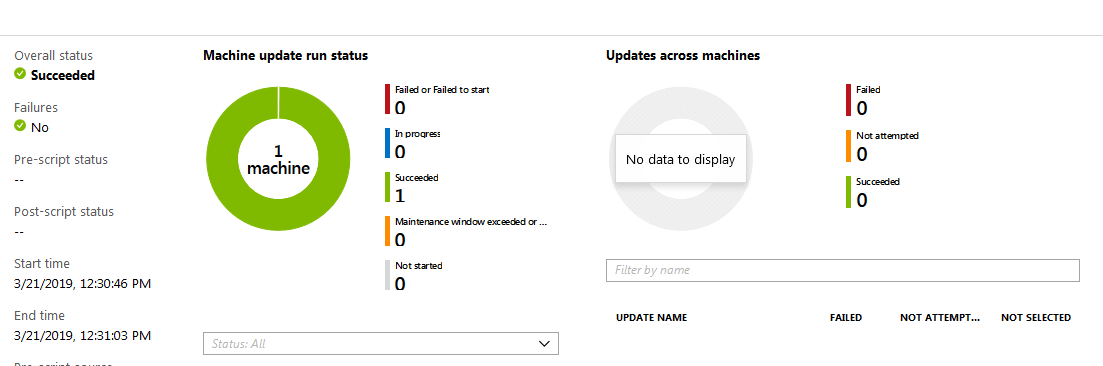
The Machine update run status will be categorized with several fields, and as shown in the image above.
Here we can conclude. I hope that referring to the steps mentioned in this post has been helpful as you work to deploy VM updates with Azure Update Management.